How small mistakes in greenhouse film installation cost real crops
I remember walking into a Santa Clara hoop house in March 2022 after a late frost and seeing frost-burned lettuce beds—my log showed a 33% loss on one bench, measured and ugly; what retrofit could have prevented that? The same season taught me that simple choices on agriculture plastic sheets change outcomes (and budgets) fast. I recommended a 200-micron LDPE film and led the team through a careful greenhouse film installation—we saw a measurable shift in night heat retention and a 12% bump in yield on repeat trials. As someone who’s handled pallets, vendor quotes, and on-site installs for over 15 years, I’ll say this straight: most installs fail not because the film is bad, but because installers ignore airflow, anchoring, and UV-stabilization specs.
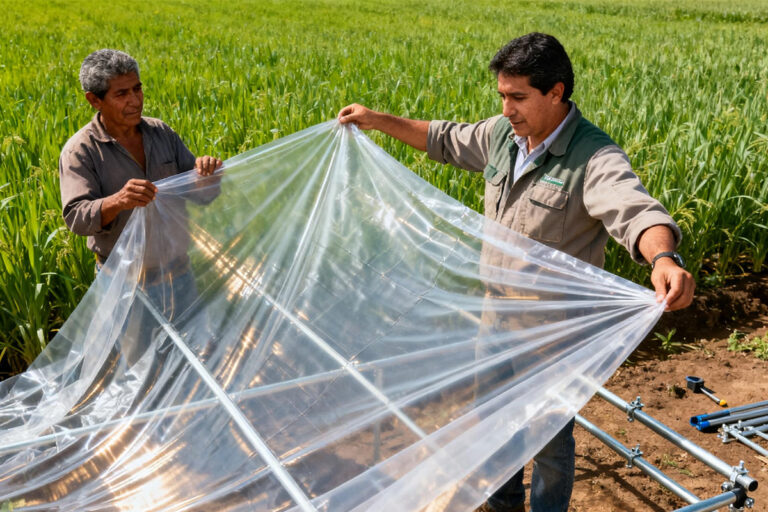
In my experience the usual fixes—tighter clips, thicker film—are surface-level. They ignore how light transmission and microclimates interact with crop timing. I’ve watched a retrofit where swapping to a diffusive film reduced sun scorch in tomatoes by 8% in one July window. Those numbers matter to wholesale buyers and greenhouse operators. The pain points are predictable: poor sealing (cold drafts), wrong edge tension (wrinkling that creates cold pockets), and mismatched polymer gauge to frame flexibility. These are installation issues as much as product choices. So let’s look at why the traditional approach still trips us up—and what to change next.
Comparative view: practical fixes and what to measure
What’s Next
I’m shifting tone here—more methodical—because when we compare solutions the differences are oddly concrete. I ran side-by-side tests last spring: standard clear LDPE vs. UV-stabilized diffusive LDPE across two identical 30×50 beds. The diffusive film kept canopy temps steadier by an average of 2.3°C overnight and cut intermittent shading losses during mid-day spikes. For installers, that means less re-tensioning and fewer emergency repairs—fewer labor hours that cut into margins. For clarity, check your steps on the greenhouse film installation checklist before assuming the film is at fault.
Here’s the practical comparison I use with clients: cost-per-season (material plus labor), effective lifespan given local UV exposure, and actual effect on crop microclimate. I weigh each metric—hard numbers, not slogans. For one vineyard in Paso Robles in 2021, switching to a higher-grade film increased active season by three weeks; that translated to a 9% revenue lift because earlier fruit hit a premium window. Interruptions happen—unexpected hail, supply delays—but the decision framework stays the same: choose films that match frame flexibility, specify UV-stabilization for your latitude, and test light transmission in-situ. Short list: LDPE gauge, diffusive finish, edge-anchoring system. Simple. Direct.
To wrap up with useful measures you can apply: 1) Measure heat retention (°C-night delta) across two weeks post-install; 2) Track re-tension events per month as a proxy for installation quality; 3) Calculate cost-per-effective-season (material + expected repairs ÷ usable months). Those three metrics separate good buys from costly mistakes. I’ve used them on bids in Central California and Oregon—results are repeatable. If you want a template for quick field testing, I’ll share mine—short, no fluff. Thanks for sticking with the details—more hands-on tips next. HGDN